
Oil Tank Inspection in NB: The Risk That Can Affect Insurance and Closing
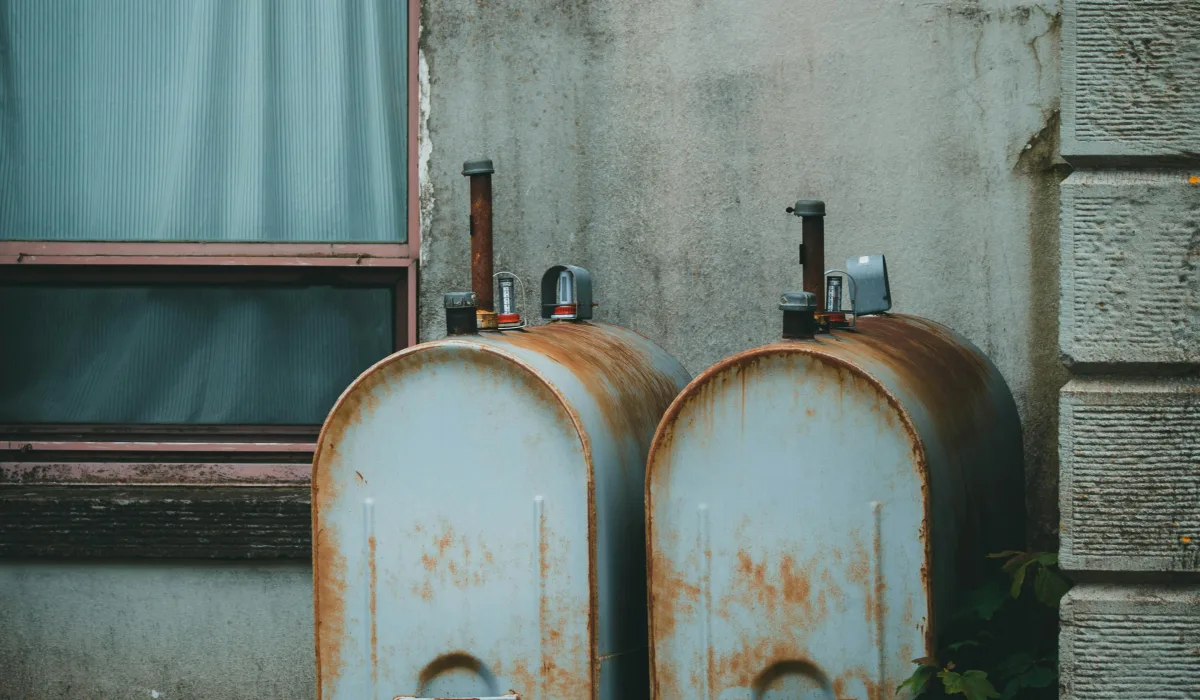
The financial risk is bigger than most buyers expect. In New Brunswick, an oil tank is not just a heating component; it is an insurability asset. If the tank does not meet underwriting constraints, an insurer may refuse to bind coverage, and your deal can stall at the exact point you need insurance confirmation to close.
That is why this issue must be handled early. A failing or uninsurable tank can force a rushed replacement, trigger price renegotiation, or in worst-case situations leave a buyer exposed to uninsured environmental cleanup if a leak is discovered late. A strong inspection process turns that risk into documented facts and practical options while you still have leverage.
Local context: Oil heat remains common across New Brunswick, and many outdoor tanks are exposed to maritime freeze-thaw cycles, road-salt influence, and moisture conditions that accelerate deterioration. Canadian insurers also apply strict insurability thresholds, so age and tank type can matter as much as visible condition.
Why Insurance Rules Drive the Conversation First
Start with underwriting, not mechanics. Even if a tank appears functional, coverage can still be restricted or declined if age/type thresholds are exceeded. In real transactions, that means your first practical question is often: Can this property secure binding coverage under current insurer rules?
As a general market pattern in Canada, many insurers apply a hard line around outdoor steel tanks at about 10 years, and indoor steel tanks in roughly the 15 to 20 year range, regardless of how clean the tank looks externally. Carriers such as Intact, Aviva, TD Insurance, and others may differ in exact wording, so always verify the current underwriting position directly with your broker or carrier before conditions clear.
Once insurability thresholds are understood, the technical inspection becomes far more useful because you can evaluate the tank against real policy constraints, not assumptions.
Steel vs. Fiberglass: Where Failure Risk Really Lives
Steel and fiberglass do not age the same way. This matters because visual confidence can be misleading.
With steel tanks, a frequent failure path is corrosion from the inside out. Over time, condensation and sludge accumulate near the bottom of the tank, and internal thinning can develop long before dramatic external warning signs appear. That is why a steel tank can look acceptable from the outside and still be approaching a high-risk condition internally.
Fiberglass tanks are non-corrosive and generally perform differently in that respect, which is one reason buyers and insurers often view them as a longer-horizon upgrade path in appropriate installations.
Visual Inspection Indicators: What Gets Checked
A standard visual evaluation should be organized and specific. These checkpoints most often affect underwriting confidence and condition-period decisions:
- The Manufacture Tag: Locate the Underwriters Laboratories of Canada (ULC) label and confirm build date, model, and certification details.
- Legs and Stability: Confirm supports are level, structurally sound, and not sinking into soil or failing on cracked concrete pads.
- The Fuel Line: Check whether copper lines touching or passing through concrete are protected by a plastic sleeve/sheath to reduce galvanic corrosion risk.
- Drip Loops and Weeping: Look for sweating, staining, or pinhole leakage near lower seams and weld zones where failure often starts.
- Corrosion Pattern: Distinguish light surface oxidation from concentrated rust at high-risk zones such as bottom edges, fittings, and supports.
- Vent and Fill Components: Verify condition and setup of fill/vent hardware, including whether signs of blockage, damage, or poor routing are visible.
This does not mean every older tank is automatically unsafe. It means your decision should be based on documented condition, age context, and insurer response together, not on appearance alone.
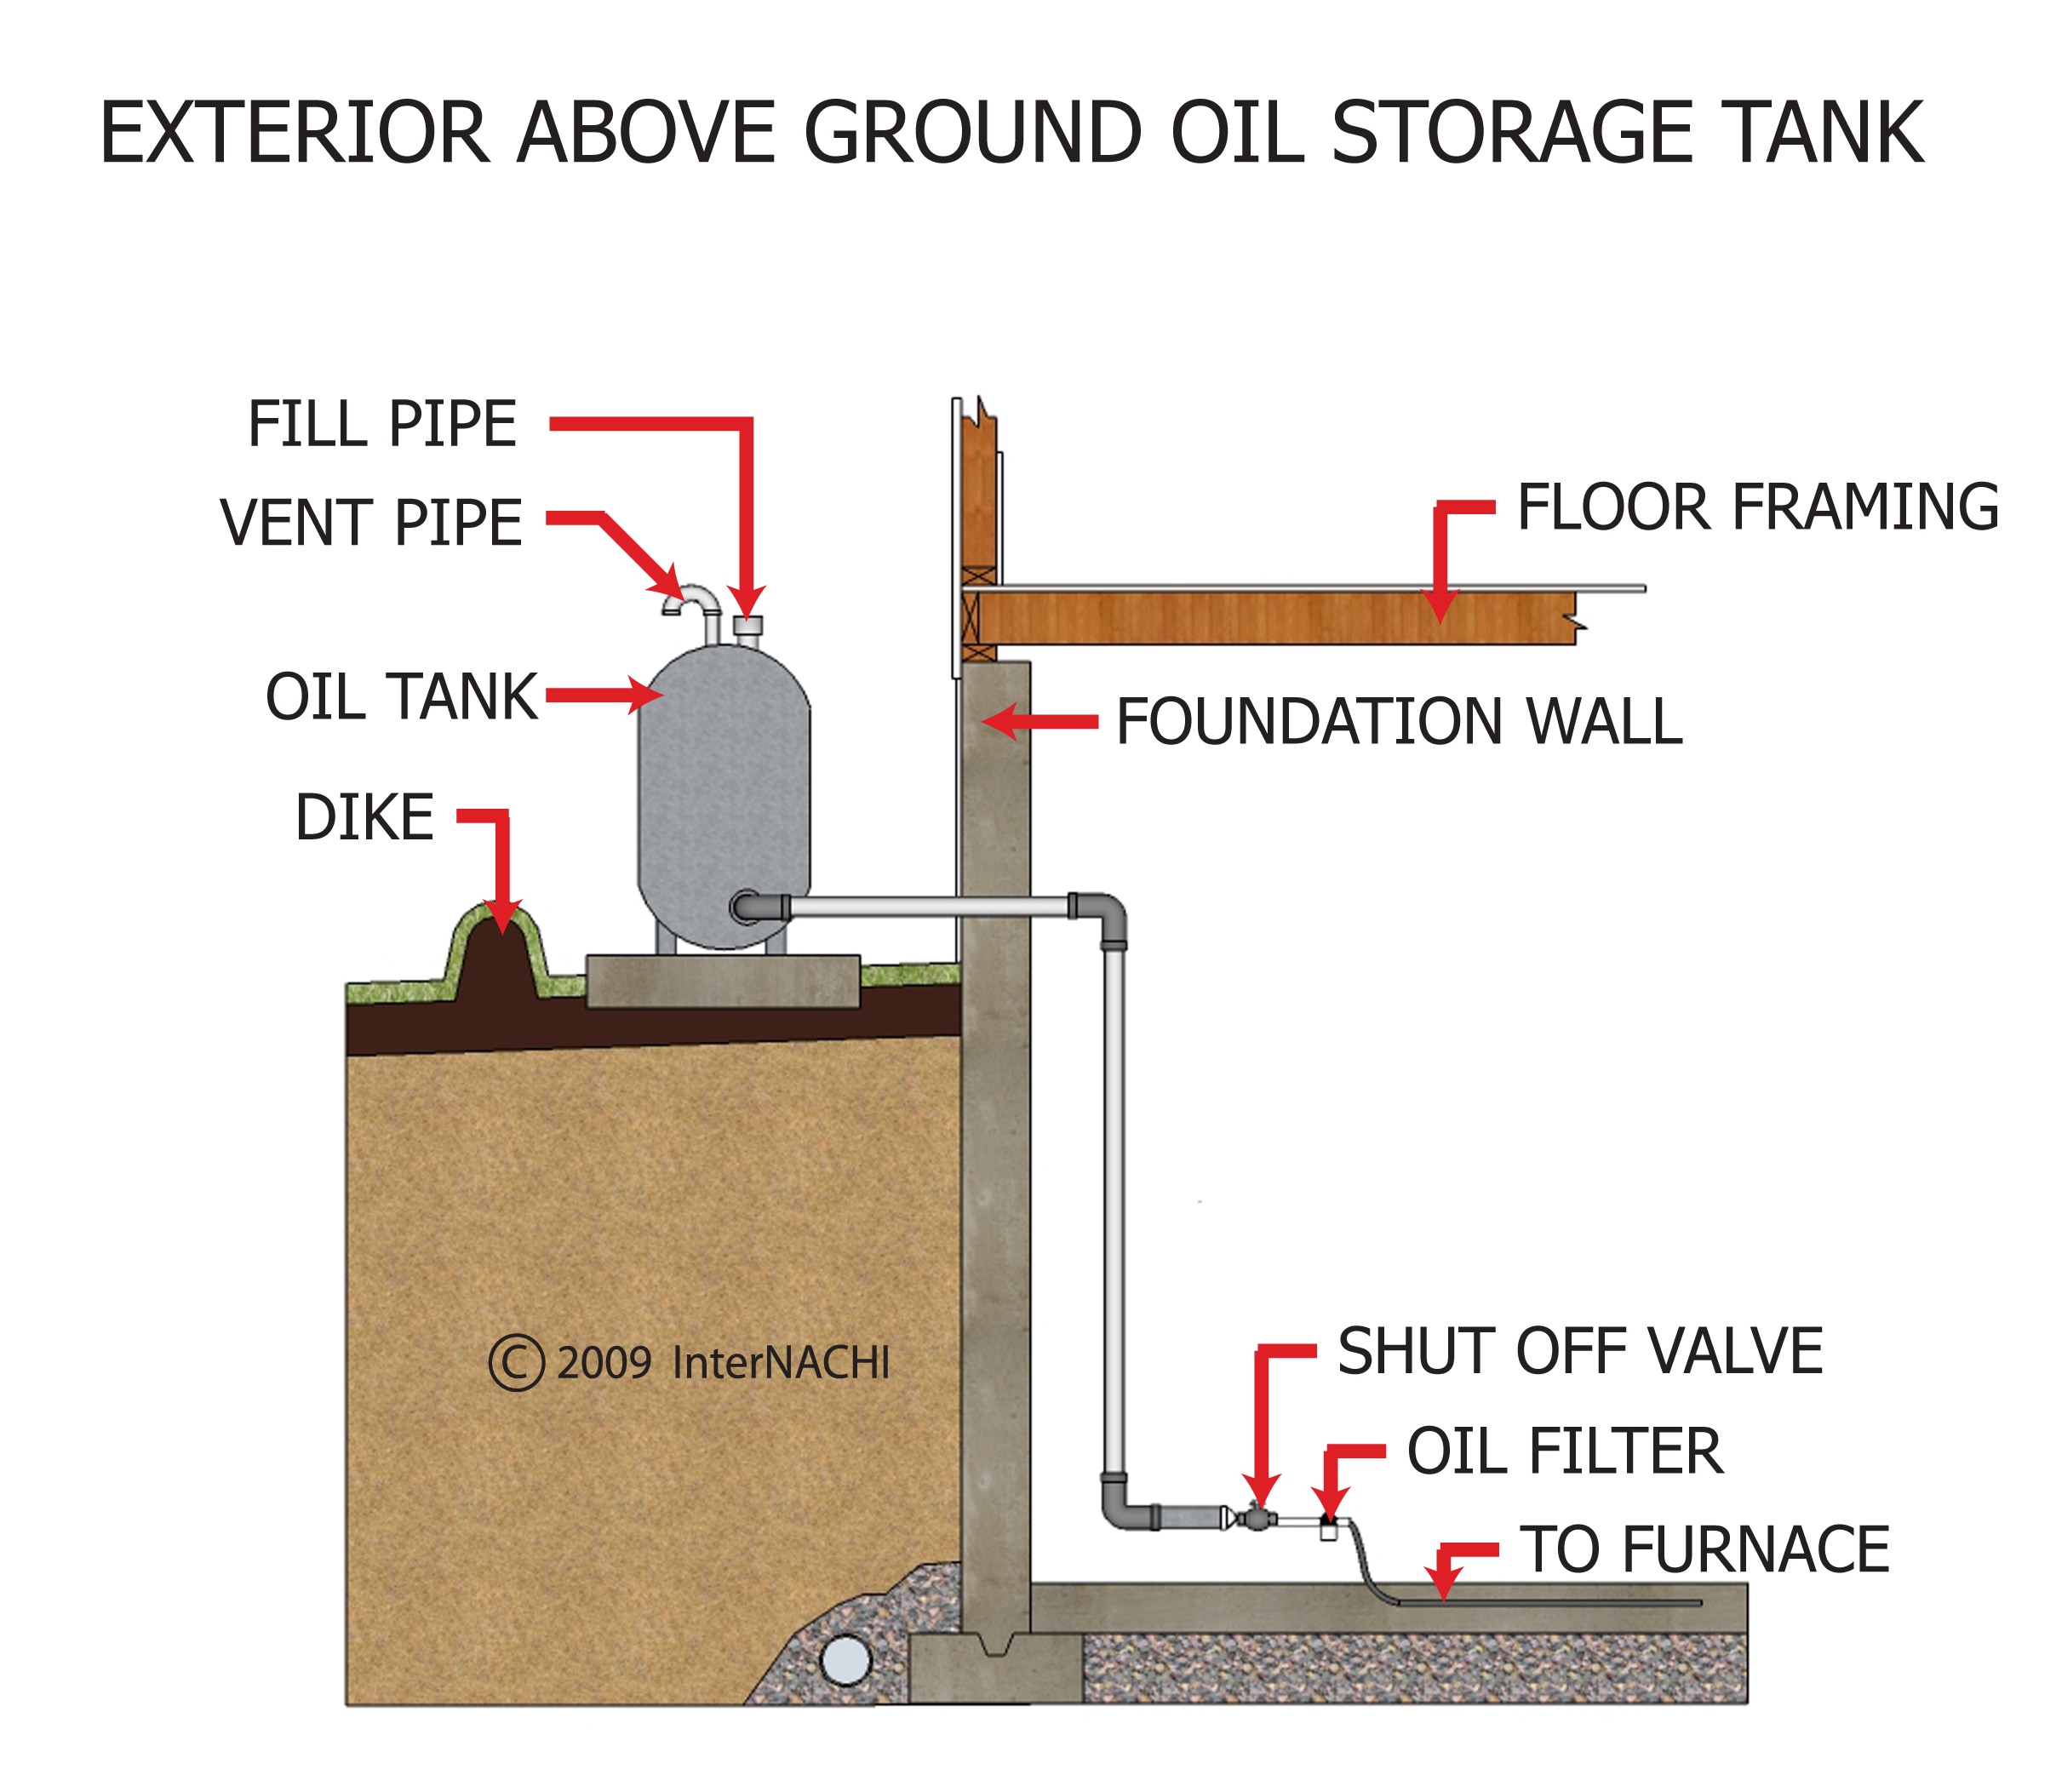
The Vent Whistle: Small Part, Big Liability Signal
One overlooked component is the vent alarm whistle. During fuel delivery, drivers listen for that whistle as confirmation of proper venting. If it does not sound as expected, delivery can be refused to prevent an overfill event. In practice, this is a safety and liability control point, not a minor detail.
If vent hardware appears compromised, treat it as an immediate service item and document it clearly for insurer review and negotiation planning.
HHT and Condition Window Action Plan
In a fast-moving transaction, timing is everything. If possible, verify tank age and type before writing an offer. If that is not possible, book your inspection immediately so any replacement or upgrade cost can be negotiated before condition removal.
- Pre-offer (best case): Ask for tank age documentation, model details, and recent service/insurance notes before offer submission.
- Day 1 of conditions: Complete inspection and capture ULC tag, condition photos, and line/support observations.
- Insurer check-in: Send documented specifics to your broker/carrier early to confirm insurability thresholds.
- Costing before condition removal: If replacement appears likely, obtain budget numbers (often roughly $2,500 to $5,000+ depending on scope/location) and negotiate credit or price adjustment while leverage is intact.
This approach prevents last-minute surprises and keeps negotiation grounded in written evidence.
From Risk Findings to Constructive Solutions
A flagged tank does not automatically mean you should abandon a property. In many cases, the stronger strategy is to convert uncertainty into a clear upgrade path and negotiated terms that protect your first-year ownership budget.
Depending on site conditions, buyers often evaluate replacement options such as modern double-bottom steel systems or long-lasting fiberglass systems. The right choice depends on insurability requirements, installation context, and maintenance preferences. The key is to confirm scope before closing, not after.
If you are comparing options before condition removal, our residential home inspection service shows how heating-system and fuel-storage risk are documented in a full decision framework.

Questions to Ask Before You Remove Conditions
If a home has oil heat, you want condition removal to be a decision point, not a gamble. Ask:
- Based on documented age/type, does this tank meet likely insurability thresholds for my target insurer?
- After separating general comments from true defects, are defect items best treated as maintenance items, recommendations, or safety concerns?
- Are there line, support, vent, or seepage concerns that could trigger coverage restrictions?
- If replacement is likely, what scope and cost should be negotiated before conditions clear?
- What documentation should be sent to the insurer immediately to avoid closing delays?
Answers to these questions keep your negotiation practical, deadline-safe, and evidence-based.
Your Next Step
If the property uses oil heat, schedule an inspection early enough to verify tank age, condition, and insurability before conditions clear. Request clear documentation for your insurer, then convert findings into a defined maintenance, replacement, or upgrade plan. With the right timing and documentation, oil-heated homes can still be strong purchases without inheriting avoidable liability.